M-F 9a-5p (PST)
Local Time: 1:43PM
Local Time: 1:43PM
Your Account
Customer Service
[email protected]

|
M-F 9a-5p (PST)
Local Time: 1:43PM |
View Cart (0) Your Account Customer Service [email protected] |
|
          |
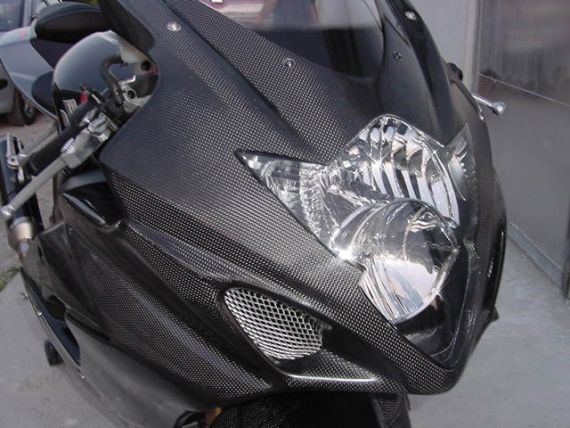
OPP Headlight Cutouts: Carbon Kevlar Reinforced for Strength Updated: February 13, 2007 (c) OPP, 2007 You may have noticed the term "street" and "race" used on our website, www.oppracing.com. These two words are often used to distinguish between products and features that are primarily used on the "street" or "racetrack". When we use these terms for our uppers, we are referring to our OEM headlight cutout options. Riders who use their bikes primarily on the street will require headlights to be installed for obvious safety or legal reasons. Racers usually have bikes that are built specifically for the racetrack - having a headlight is not a desirable trait because there is no need (ie. they are racing in daylight under controlled conditions) and because it adds unnecessary weight. In this article, we will take a closer look at the OPP headlight cutout option and see just how much work goes into the process. A proper headlight cutout is more than cutting out a hole in the bodywork - it is a delicate process that requires a lot of material, experience and expertise, time and patience. Anatomy of an OPP Headlight Before we start, let's make sure we're using the same language! Below, we have a picture of a Suzuki GSXR1000 2005-2006 upper in carbon fiber. The upper is the top portion of your bodywork which houses your headlight assembly and to which your mirrors, windscreen and airducts are attached. GSXR models usually have a single OEM headlight assembly which houses the high beam and low beam projectors. Other bikes like the Yamaha R1 or Honda CBR1000RR have a two headlights, one dedicated to the high beam and the other to the low beam.
An OPP upper differs from the stock bodywork because we attach the headlight assembly directly to the upper piece. This headlight assembly is attached to the carbon fiber upper using stainless steel mounting posts on the inside of the fairing. You can't make a carbon fiber piece with metal attached so this is added after the carbon piece has been moulded, cut and polished. It takes a specialist about 6 hours to cut out the headlight hole, installed the stainless steel mounting posts, use carbon kevlar and resin to reinforce the mounting posts and tidy everything up. But there's more to it! Let's take a look at the whole process.
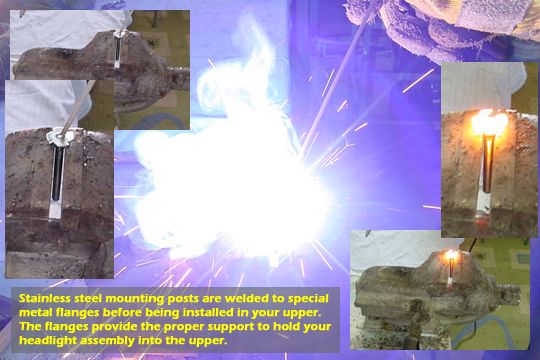
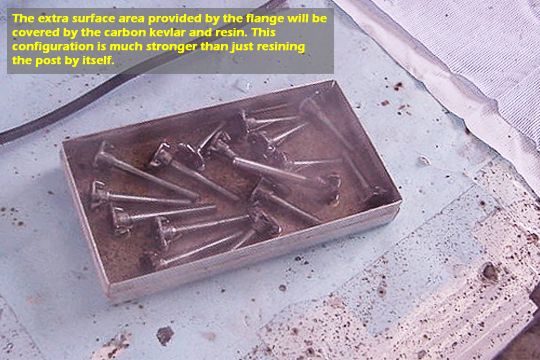
OPP Headlight Cutout Process The headlight cutout process begins with the stainless steel mounting post. An OPP mounting post is comprised of a stainless steel rod and a metal flange. This flange is welded to the bottom of the rod so that there is more surface area to attach the mounting post to the upper. Our specialist will use bits of carbon kevlar fabric and resin to "glue" the mounting post to the upper. If this doesn't make sense, just wait and we'll show you the inside of a completed upper.
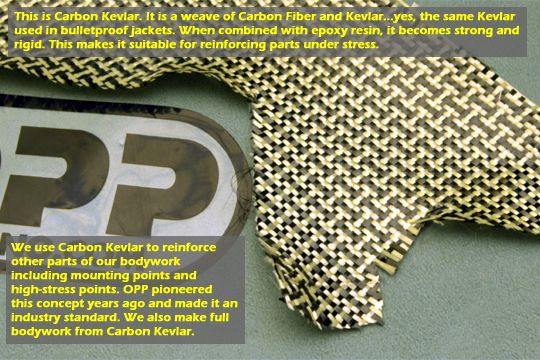
What is carbon kevlar? Carbon kevlar is a fabric that is comprised of two materials: carbon fiber and kevlar. The carbon fiber is the same carbon fiber we use for our bodywork, just like the GSXR1000 2005-2006 depicted above. The kevlar is like kevlar used in the creation of bulletproof vests and body armor. While it won't make your bike bulletproof, it will make the fabric stiff when resin is applied. We want our mounts to be strong and stable so this is why we use carbon kevlar instead of "strong but flexible" carbon fiber. Side track! Note that this is the same material that we use for reinforcing our mounting points. OPP pioneered the concept of the carbon kevlar reinforced mounting point many years ago, starting with our fiberglass bodywork. As we know, fiberglass is very light but not terribly strong. Areas that are attached to the bike undergo a lot of stress when they are being drilled for mounting hardware and when the bike is moving at high velocities. We started to apply carbon kevlar and resin to the mounting points as well as other crucial areas such as mirror mounts and edges for dzus fasteners so that the piece was reinforced at stress points. This made our bodywork a lot more durable than our competitors' bodywork. Since then, our idea has been copied by many but still an OPP original. Ok, enough history, back to headlight cutouts!!! Side track to the side track! We also use the carbon kevlar for full bodywork as well as the construction of our carbon fiber gas tanks.
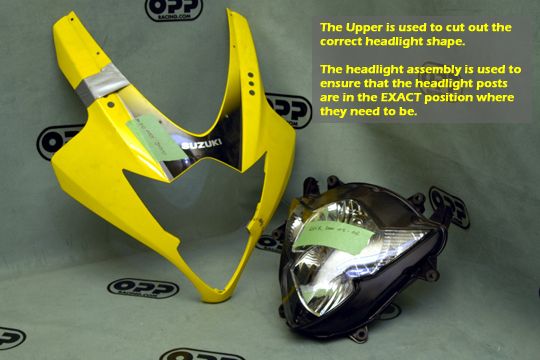
So we have the mounting posts, carbon kevlar and resin. Now we attach the mounting posts and we're ready to go, right? Oh wait...there's no hole in the bodywork! We need to cut out the shape of the headlight assembly so we can install the light. To do this properly, we need the original bodywork and a headlight assembly. First, we use the original upper to scribe and cut out the shape of the upper and then we test the headlight hole using the headlight assembly. Since the bodywork is not a flat surface, it's very difficult to cut out the proper hole on the first try. The specialist needs to cut out the basic shape and then slowly shave off parts of the upper to match the headlight hole exactly. It's a very time consuming job that needs to be done for every upper.
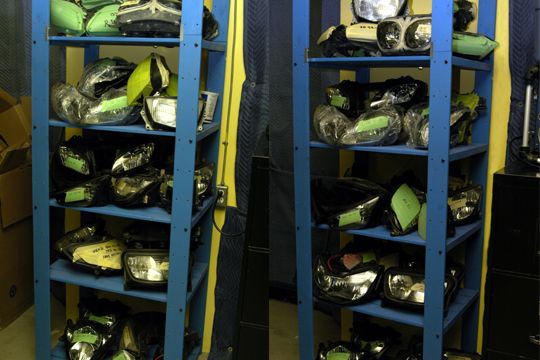
In case you're wondering, we have a lot of headlights and uppers. We took a few shots of the shelves in our warehouses to show how many we have. We actually have more headlights at the main factory.
When the headlight hole is cut to the exact shape of the OEM headlight assembly, the specialist attaches the mounting posts using the carbon kevlar and resin. The specialist uses the headlight assembly again, this time to ensure that the mounting posts are aligned exactly with the mounts on the headlight assembly. This is a difficult task because the carbon kevlar and resin need to be applied while the headlight is in position. There isn't a lot of room to manuever inside the upper - sometimes our poor specialist can't even see the mounting posts and needs to apply the resin blind. Once the resin has had a chance to cure overnight, the specialist removes the headlight assembly to inspect the mounting posts. If he doesn't do the job right, the mounting post will need more resin and time to cure. The worst case scenario is that the mounting post is not secure and falls out of place when the headlight assembly is removed. This means that the specialist needs to do the entire job again to make sure that it's perfect when it gets to you.
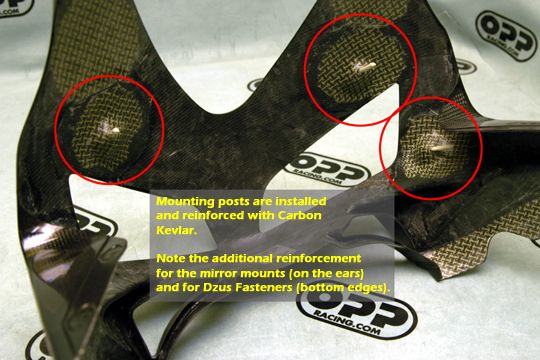
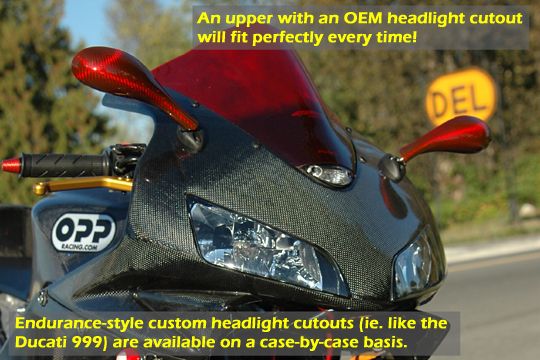
When the headlight cutout process is completed, you will have mounting posts that are installed to fit your headlight assembly perfectly. The alignment of the posts and the outline of the headlight cutout will be just right. Note in the picture above, you can also see the carbon kevlar reinforcement for the mirror mounts and dzus fasteners.
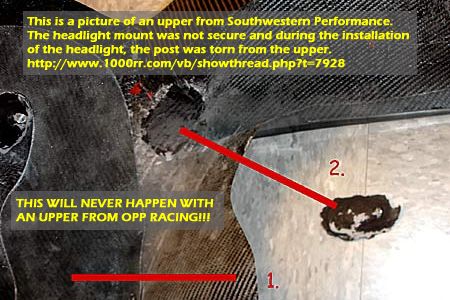
So that's it! Easy task, wasn't it? Ha, it's a lot of work and we appreciate the time and effort that is spent by our headlight specialists. Even though they have many years of bodywork manufacturing experience, every headlight cutout is unique and needs to performed with the same amount of care. By the way, did you ever wonder what our competitors were doing??? (In case you are wondering, that is a 2003 Honda CBR600RR with a carbon fiber HRC-replica bodywork kit. Also visible are LighTech carbon fiber mirrors in red, CRG levers in short gold and a Puig double-bubble windscreen. If you look carefully, you can also see the Gilles Tooling variobar clip-ons with red bar-ends.) Bad Headlight Jobs We were emailed a link to a thread on CBR1000RR.com. The original link is below. If it gets deleted for "mysterious reasons", don't worry, I saved it onto my hard drive and can post a zip file with the original content. https://www.1000rr.com/vb/showthread.php?t=7928 In this thread, a customer had purchased a CBR1000RR 2004-2005 upper from a company called Southwestern Performance. When the customer tried to install their headlight assembly, it didn't fit right. The rep at Southwestern Performance insisted that "this is far better than OPP stuff." Well, the customer had a qualified Honda mechanic install the headlight and the mounting post BROKE OFF. It took a chunk right out of the bodywork. Here's a picture below:
So...this is better than OPP...oh snap, here's the whole post from 1000RR.com:
My favorite line: "Turns out, the maker, Southwestern Performance (So Cal) admited to the mechanic that they had never actually tried this bodywork on a street 1000rr with headlights mounted..." "In contrast we've seen in another thread that the OPP stuff does work". Well now you know WHY OPP's stuff works. It's important that you have all the information you need to make an informed decision when you buy a product. At OPP, we want to educate you about our products so that you understand and appreciate them.
Custom Headlights by OPP
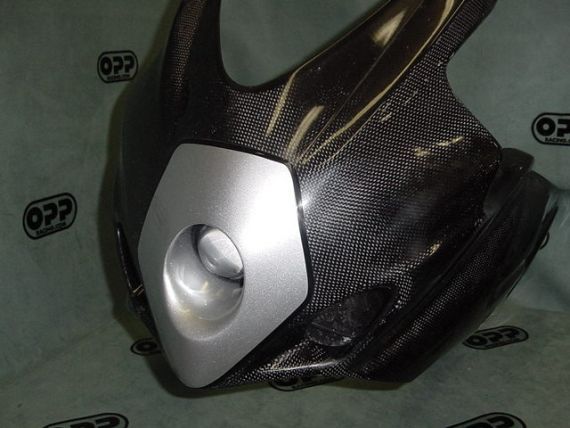
CBR900RR 1998-1999 Titanium Silver Bodywork with Dual Headlight Cutout
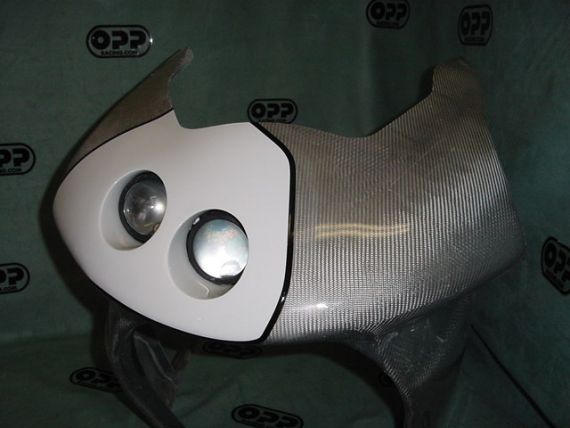
GSXR1000 2005-2006 Carbon Fiber Bodywork with Single Headlight Cutout
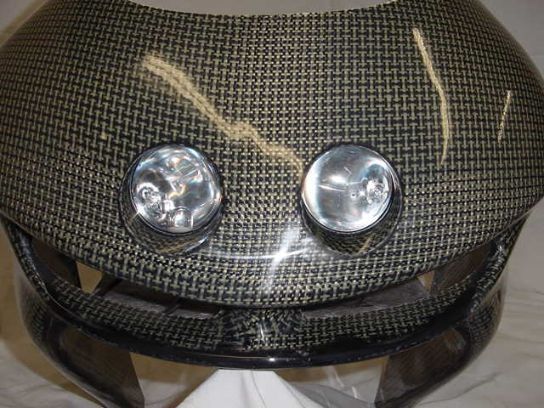
ZX6R 1998-1999 in Carbon Kevlar Bodywork with Dual Headlight Cutout
Final Words
That's all I have to say about our OPP headlight cutouts. It's a tough job even for our dedicated bodywork specialists but that's okay because we want to provide only the best aftermarket products to you. THESE HAVE BEEN DISCONTINUED !!!!!!!!!!! Sorry. Sep 20 2014 Return to the Articles main page. |
|
||||||||||||