Part A: Brembo 19RCS Master Cylinder Lever Disassembly
|
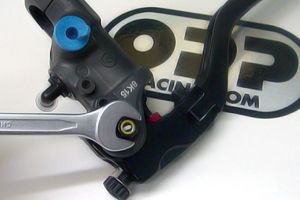 |
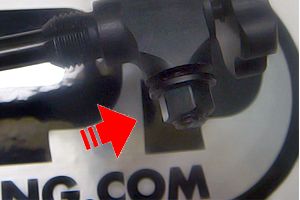
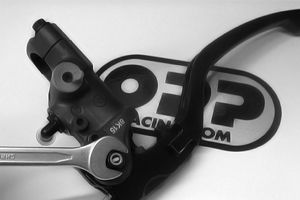
Step 1: Start by removing the nut at the bottom of the Brembo 19RCS Master Cylinder with a 10mm wrench. |
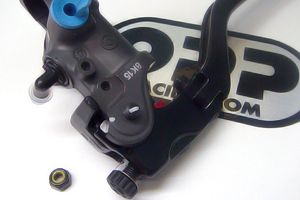 |
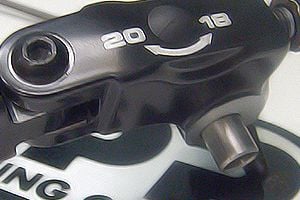
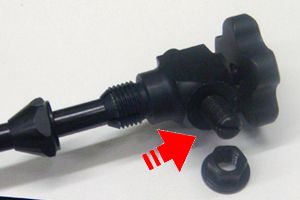
Step 2: This is what the Brembo 19RCS looks like with the nut removed. |
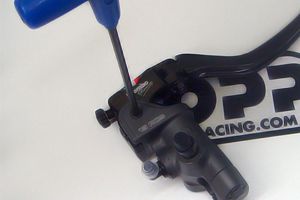 |
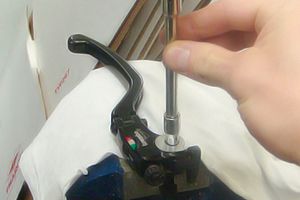
Step 3: Remove the screw on the top of the Brembo 19RCS master cylinder |
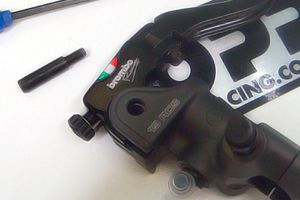 |
Step 4: This removes the mounting pin that secures the brake lever. To swap a replacement lever, simply remove this lever, put the new one in and reverse the install. |
 |
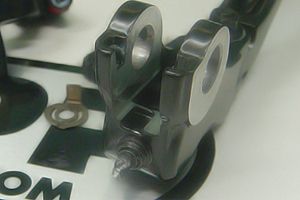
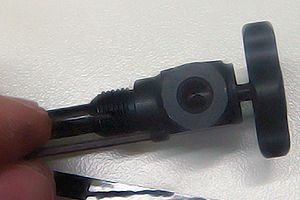
Step 5: Now you should have the lever portion of the master cylinder removed. If you were to do a lever swap, this is all you would have to do to replace a broken lever. Now see that collar inside the opening? You will have to remove that collar to disassemble the lever. |
 |
Step 6: With the Brembo 19RCS replacement lever, brace the lever against a padded hard surface (a vice works great). Next you will remove the collar that holds the pressure switch to the lever. |
 |
This is a picture showing the collar partially removed. |
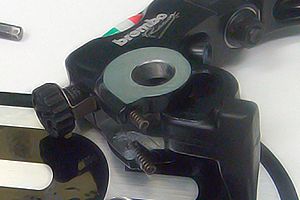 |
Once the collar is removed on the 19RCS lever, you will see two springs exposed. These springs control the brake micro switch built into every Brembo 19RCS to active the brake light. Careful not to lose these springs! |
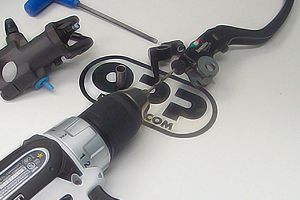 |
Step 7: Next you will have to drill out the current adjuster on the lever. The knob will break in the process but that’s ok because the entire adjustment mechanism is being replaced with LighTech. |
 |
This is what it looks like once the adjustment knob is drilled out. |
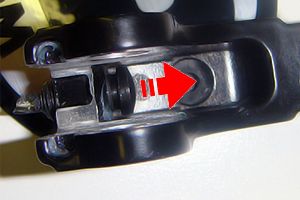 |
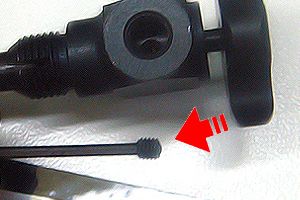
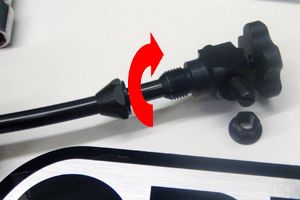
Step 8: With the adjustment knob removed, now you can remove the original adjustment mechanism internal. Remove the internal adjuster in the direction of the lever tip (red arrow in the picture!). |
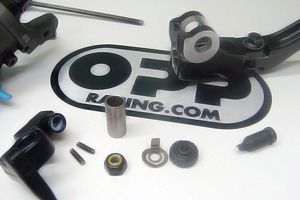 |
This is what the Brembo lever looks like completely disassembled. Now you can move on to disassembling the LighTech remote adjuster. |
Part B: LighTech 19RCS Remote Adjuster Disassembly
|
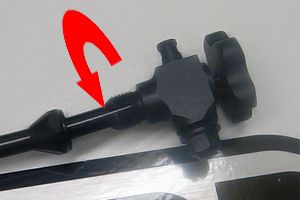 |
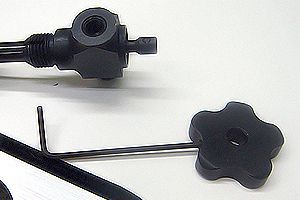
Step 9: Start by unscrewing the adjuster mechanism from the hex nut holder, do this by rotating the entire adjustment mechanism (the square part) counter clockwise. |
 |
Step 10: Unscrew the nut on the adjuster using a 8mm wrench |
 |
Step 11: This is what it looks like after you unscrew the nut. Unscrew the pin using a flat head screw driver. Side note: this screw is used to control the tension for adjustment. |
 |
If you look carefully into the hole, there are a number of circular indentations and 2 allen-head screws on the internal adjuster body. Side note: These indents creates the adjustment “clicks” (indexed adjustment) felt when adjusting the brake lever. |
 |
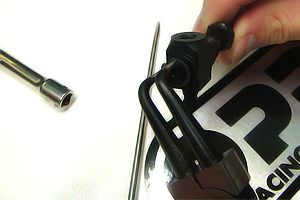
Step 12: Use the provided allen key to remove each of the 2 screws. You will have to rotate the adjustment knob to get to the screws. |
 |
Step 13: Next you disconnect the adjuster knob from the adjuster body. Use the provided allen key to unscrew the mounting pin on the knob and remove the knob. |
 |
Step 14: Upon removal of the adjustment knob, you will see a C-clamp holding the adjuster mechanism onto the wire. Remove the C-clamp using a pair of snap ring pliers. |
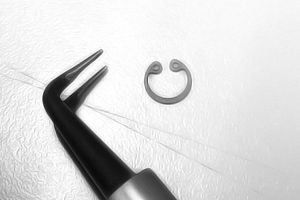 |
This is what the C-clamp looks like once removed. |
 |
Step 15: With the C-clamp removed, slide the entire adjuster mechanism off the cable and slide the adjuster off |
 |
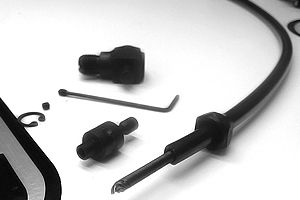
This is what the LighTech remote adjuster looks like with the entire adjustment mechanism removed. |
 |
Step 16: Thread the remote adjustment cable through the Brembo lever where the original adjuster was located.
Next you will re-assemble the remote adjuster and the Brembo lever to complete the install. |
Part C: LighTech Remote Adjuster Reassembly
|
|
Step 17: With the adjustment cable threaded through the Brembo 19RCS Lever, slide the LighTech adjuster body (long hollow tube) back over the adjustment cable. |
|
Step 18: Put the rectangular adjuster mechanism back over the adjuster body and secure it using the C-clamp and snap ring pliers. |
|
Step 19: Reinstall the adjuster knob by placing it over the adjuster end and securing with the allen screw using the provided allen key. |
|
Step 20: Reinstall the 2 small allen screws into the adjuster body through the hole on the adjuster mechanism. You will have to rotate the adjuster knob to install both screws. |
|
Step 21: Reinsert the adjuster pin into the adjuster mechanism. This pin controls the amount of indexing resistance on the adjuster knob. Using a flat head screw driver, tighten the pin to the desired setting. |
|
Step 22: Tighten the nut on the adjuster pin using a 8mm wrench to "set" the adjustment knob indexing resistance. |
 |
Step 23: Tighten the entire adjustment mechanism by rotating it clockwise onto the perch. |
Part D: Brembo 19RCS Brake Master Reassembly
|
|
Step 24: Now it's time to reassemble the Brembo 19RCS Brake Master Cylinder. The LighTech remote adjuster cable should already be threaded through the lever in place of the original adjustment knob. Insert the 2 small springs back into the Brembo lever and insert the Brembo micro-switch paddle back into the lever against the springs. |
|
Step 25: Reinsert the collar back into the Brembo lever. This collar holds the microswitch in place and completes the lever assembly. |
|
Step 26: Place the Brembo 19RCS replacement lever back into the master cylinder housing and re-insert the mounting pin. |
|
Step 27: Insert the mounting pin back into the master with the threaded side down (as pictured). |
 |
Step 28: Tighten the nut at the bottom of the Brembo 19RCS master cylinder. |
| You're Done! Now that you have the LighTech remote adjuster mounted on the Brembo 19RCS master cylinder, test the lever adjustment using the remote adjuster. Now all you have to do is mount the adjuster mechanism on the clutch side and enjoy remote adjustability on your brakes! If you have any questions with the installation process or the LighTech remote adjuster in general, please give our trained sales staff a call at 604-942-6744 or via email at [email protected] |